How To Cure Garlic After Harvest: The Ultimate Guide for Long-Term Storage
Harvesting your own garlic is a rewarding experience, but the journey doesn’t end there. Properly curing your garlic after harvest is absolutely crucial for ensuring its long-term storage, preventing spoilage, and maximizing its flavor. This comprehensive guide will walk you through every step of the process, from knowing when to harvest to the ideal storage conditions, ensuring you enjoy your homegrown garlic for months to come. We’ll delve into the nuances of curing, addressing common pitfalls and offering expert tips to help you achieve the best possible results. Our goal is to empower you with the knowledge and confidence to successfully cure your garlic harvest year after year.
Why Curing Garlic is Essential
Curing garlic is more than just drying it; it’s a specific process that allows the outer skins to dry and tighten, creating a protective barrier around the cloves. This barrier prevents moisture loss, inhibits mold growth, and allows the garlic to develop its full, robust flavor. Without proper curing, your garlic is likely to rot, sprout prematurely, or simply dry out and become unusable. Think of it like this: curing is to garlic what aging is to cheese or wine – a transformative process that enhances its best qualities. The curing process allows the garlic to transition from a freshly harvested state to a stable, storable form.
The Science Behind Curing
The curing process relies on controlled dehydration. As the garlic dries, the moisture content within the bulb decreases, making it less hospitable to spoilage organisms. The outer layers of the bulb become papery and tight, forming a protective shield. During this time, enzymatic processes continue within the garlic, influencing its flavor profile. Insufficient curing leaves the garlic vulnerable to mold and rot, while excessive drying can lead to shriveled, flavorless cloves.
Knowing When to Harvest Your Garlic
Timing is everything when it comes to harvesting garlic for curing. Harvesting too early or too late can negatively impact the curing process and the overall quality of your stored garlic. The ideal time to harvest is when the lower leaves of the plant begin to turn brown and die back, while the upper leaves are still mostly green. This typically occurs in mid-summer. Approximately one-third to one-half of the leaves should have browned. This indicates that the bulb has reached its maximum size and the plant is beginning to focus its energy on bulb development rather than leaf growth.
Signs of Overripe Garlic
Harvesting too late can result in bulbs that have begun to split open, making them more susceptible to disease and reducing their storage life. The cloves may also become loose and discolored. If you notice these signs, harvest immediately, but be aware that the storage potential may be compromised.
Testing for Readiness
If you’re unsure, dig up a test bulb to assess its maturity. The bulb should be well-formed with tightly wrapped cloves. The outer skins should be thick and papery. If the bulb is small or the cloves are loosely arranged, it’s best to wait a bit longer before harvesting the entire crop. This test bulb can give you valuable insight into the overall readiness of your garlic.
The Step-by-Step Guide to Curing Garlic
Now that you know when to harvest, let’s dive into the curing process itself. Follow these steps for optimal results:
- Harvest Carefully: Gently loosen the soil around the garlic bulbs with a garden fork, being careful not to damage the bulbs. Lift the bulbs from the soil, shaking off any excess dirt. Avoid pulling on the stalks, as this can cause bruising.
- Clean the Bulbs: Remove any large clumps of soil from the bulbs, but do not wash them. Washing can introduce moisture and promote rot during curing. A soft brush can be helpful for removing stubborn dirt.
- Prepare for Curing: Leave the stalks and leaves attached to the bulbs. These will help to draw moisture out of the bulbs during the curing process. If the stalks are excessively long, you can trim them slightly, but leave at least 4-6 inches attached to the bulb.
- Choose a Curing Location: Select a well-ventilated, dry, and shady location for curing. An attic, shed, or covered porch works well. Avoid direct sunlight, as it can scorch the bulbs. The ideal temperature range for curing is between 70-80°F (21-27°C). Good air circulation is critical to prevent mold growth.
- Arrange the Garlic: There are several ways to arrange garlic for curing:
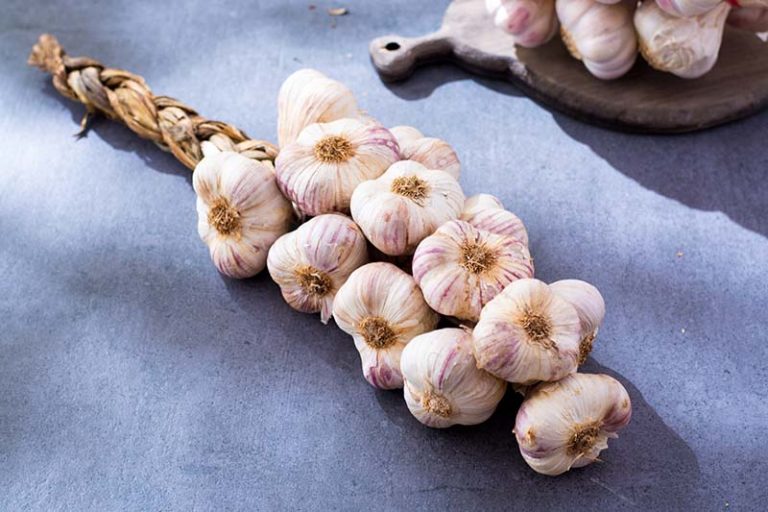
- Braiding: Braiding garlic is a traditional method that allows for good air circulation. Braid together 8-12 bulbs, starting with the strongest stalks. Hang the braid in your curing location.
- Bundling: Tie the stalks of 6-8 bulbs together with twine. Hang the bundles upside down in your curing location.
- Single Layer: Spread the bulbs in a single layer on screens or racks, ensuring good air circulation around each bulb. This method is ideal if you have limited space.
- Monitor the Curing Process: Check the garlic regularly for signs of mold or rot. Remove any affected bulbs immediately to prevent the spread of disease. Ensure adequate air circulation by adjusting the arrangement of the garlic if necessary.
- Curing Time: The curing process typically takes 2-4 weeks, depending on the humidity and temperature. The garlic is fully cured when the stalks and outer skins are completely dry and papery. The bulbs should feel firm and the cloves should be easily separated.
Troubleshooting Common Curing Problems
Even with careful attention, problems can sometimes arise during the curing process. Here are some common issues and how to address them:
- Mold Growth: Mold growth is usually caused by insufficient air circulation or high humidity. Ensure good ventilation and remove any affected bulbs immediately. You can also try wiping the affected areas with a diluted vinegar solution.
- Rotting: Rotting is often a sign of harvesting damaged bulbs or improper curing conditions. Discard any rotting bulbs and improve air circulation. Avoid overcrowding the garlic during curing.
- Sprouting: Sprouting can occur if the garlic is exposed to excessive moisture or warmth. Ensure the curing location is dry and cool. Sprouted garlic is still edible, but it won’t store as long.
- Soft Bulbs: Soft bulbs indicate that the garlic hasn’t fully cured. Extend the curing time and ensure good air circulation.
Preparing Garlic for Long-Term Storage
Once the garlic is fully cured, it’s time to prepare it for long-term storage. Follow these steps:
- Trim the Stalks and Roots: Use clean pruning shears to trim the stalks to about 1-2 inches above the bulb. Trim the roots close to the bulb.
- Clean the Bulbs (Optional): Gently brush off any remaining dirt from the bulbs. Be careful not to damage the outer skins.
- Inspect for Damage: Thoroughly inspect each bulb for any signs of damage, disease, or soft spots. Discard any affected bulbs.
Optimal Storage Conditions for Cured Garlic
Proper storage is essential for maintaining the quality and flavor of your cured garlic. Aim for these conditions:
- Cool Temperature: The ideal storage temperature is between 55-65°F (13-18°C). Avoid storing garlic in the refrigerator, as this can promote sprouting.
- Low Humidity: Garlic stores best in low humidity. Avoid storing it in damp basements or areas with high moisture levels.
- Good Ventilation: Ensure good air circulation around the garlic to prevent mold growth. Store the bulbs in mesh bags, baskets, or crates that allow for airflow.
- Darkness: Store garlic in a dark location to prevent sprouting. Light can stimulate growth and reduce the storage life of the bulbs.
The Role of Dehydrators in Curing Garlic
While traditional air-curing is the most common method, food dehydrators can offer a faster and more controlled alternative, especially in humid climates. The key to successfully using a dehydrator for curing garlic is to use a low temperature setting (around 90-95°F or 32-35°C) and to monitor the garlic closely. The process typically takes 2-3 days, depending on the dehydrator and the size of the bulbs. Dehydrators offer a controlled environment, mitigating risks associated with fluctuating ambient conditions.
Benefits of Using a Dehydrator
- Faster Curing Time: Dehydrators significantly reduce the curing time compared to traditional air-drying.
- Controlled Environment: Dehydrators provide a consistent temperature and humidity level, minimizing the risk of mold growth.
- Suitable for Humid Climates: Dehydrators are particularly useful in humid climates where air-drying can be challenging.
Drawbacks of Using a Dehydrator
- Equipment Cost: Dehydrators require an initial investment.
- Energy Consumption: Dehydrators consume electricity, which can add to your energy bill.
- Potential for Over-Drying: Over-drying can result in shriveled, flavorless cloves. Monitor the garlic closely and adjust the drying time as needed.
Garlic Keeper Pots: Preserving Quality After Curing
Once your garlic is cured and ready for use, a garlic keeper pot can help maintain its quality and freshness. These pots are typically made of ceramic or earthenware and are designed to provide optimal air circulation and humidity control. A good garlic keeper will have ventilation holes to prevent moisture buildup and a dark interior to protect the garlic from light. They extend the shelf life of individual bulbs after curing is complete.
Key Features of a Good Garlic Keeper
- Ventilation Holes: Ensure adequate air circulation to prevent mold growth.
- Dark Interior: Protects the garlic from light, which can stimulate sprouting.
- Durable Material: Choose a pot made of durable, food-safe material.
- Airtight Seal (Optional): Some keepers offer a partial airtight seal to further control humidity.
- Easy to Clean: Select a pot that is easy to clean and maintain.
The Enduring Value of Properly Cured Garlic
Mastering the art of curing garlic after harvest is an investment that pays off in flavor, longevity, and satisfaction. By following these expert tips and techniques, you can ensure a bountiful harvest of delicious, long-lasting garlic that will enhance your culinary creations for months to come. From understanding the nuances of harvesting to optimizing storage conditions, every step contributes to the final product. So, embrace the process, experiment with different methods, and enjoy the rewards of your homegrown garlic!
